Sunday, 1 February 2015

A baker for bread, and a Prince for... whatever..

The first thing I had to make was a teeny bakers hat for my armature!
So firstly to make the band for the hat, I measured a stripe of white felt around the armatures head, and then sewed material over the top. 


To create the top of the hat, I had to ruffle the bottom of the white felt, then sew it onto the hat band. 


The hat band ends were then sewed together, and put inside out so I could sew a ruffle into the top of the hat. 


Then I turned the hat the right side out and ta daaa! 


Oh, and I've also made a little cake stand for the animation too. This was super quick too make so kinda tempted to make another, neater one. To give me something to mould the clay around I used balsa wood. Then used FIMO oven clay to do the rest!


Saturday, 31 January 2015

Pre-Production for the final project!

Pre-production for my Final project in university! Scary! I've decided to do another show-reel, as my goal is to be able to leave this course feeling completelyyy comfortable with animating! I'm doing an animation course after all...

So my show-reel is broken down into three stages (Just like last years one!)
Stage 1 - Basics Exercises
Stage 2 - Mime 
Stage 3 - Final Performance 

Stage 1

For the basic exercises I've planned three small animations, the first involving a hover-board!
It's 2015, I want a hover board damn it. 
Below is the plan for making the board itself, which even though I kinda struggle with the whole making part I'm so excited to make it! Then below that are the thumbnails of some poses of the armature with the board, then finally the thumbnails for the animation. Plan of attack is kinda simple, armature gets on hover board, hovers around for a bit, gets too confident, board stops, armature doesn't!


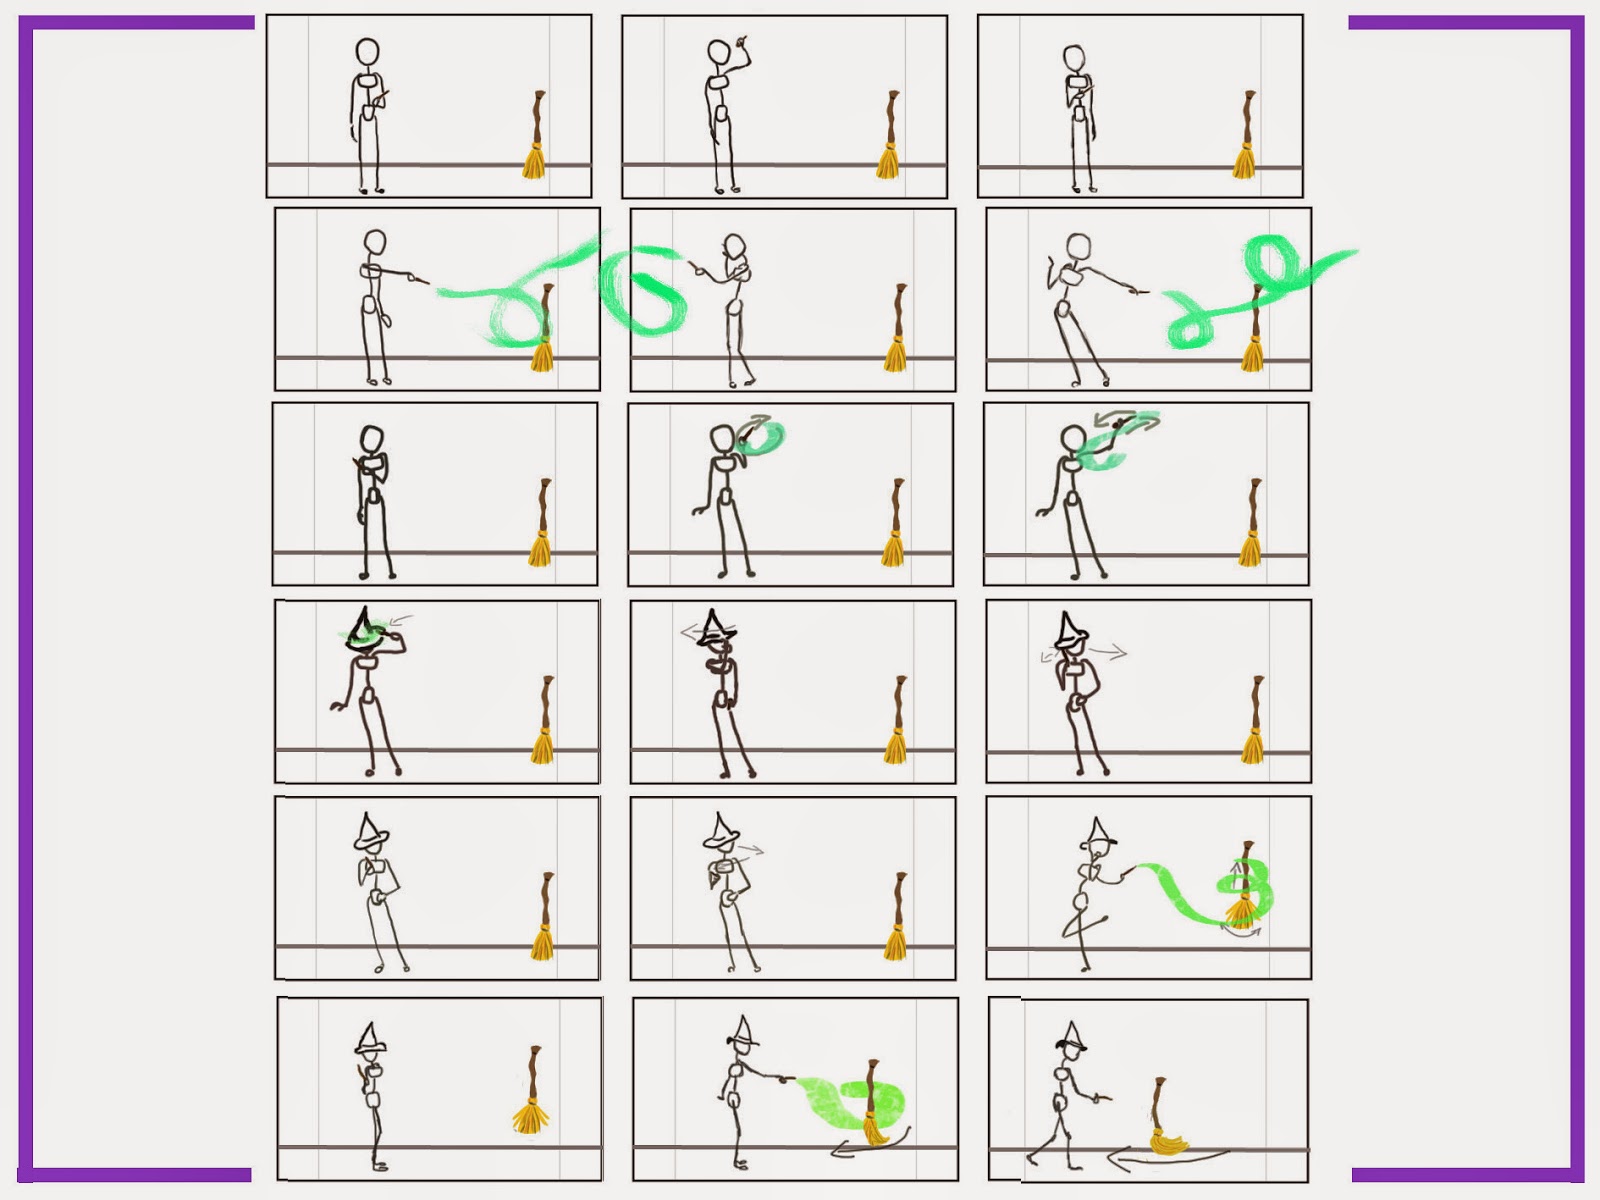
I had so much fun with the whole magic theme during the last project I wanted to do something else with the witch! Plus this means I can get a second use out of the witches hat I made. This idea is not so much about character animation, but more a chance to play with animating a prop. Decorating cakes is always fun, so thought I'd give animating a cake being decorated by 'magic' a go!
Below are some ideas/designs and the thumbnails.  


(Made a snazzy rose out of icing. Edible materials are way more fun!)


The last part of Stage 1 is going to be a basic monkey walk, as I never did quite master a four legged walk in first year. My cat armature looked like an AT-AT and was animated like it had spaghetti legs.
Below are two little doodles and quick thumbnails. To make the walk look a bit more interesting I want to make it look like its walking along a branch.


Stage 2

Last year my stage 2 animations only involved one character, so this year I'm guna try stepping up a notch and animate two characters! We'll see how it goes.. So I can get another use of the monkey armature I've planned to animate an interaction between a monkey and an explorer. Below are the set/prop designs and the thumbnails. 


The other part of Stage 2 is going to involve two characters on a roller-coaster, one having the time of its life and the other hating every second! I'm looking forward to animating two characters with such different emotions! 
Below are some drawings I did while trying to figure out how I'm going to film this, along with the prop design and thumbnails! 


One amazing thing about having a drama queen for a sister = I get the best LAVs. 


Stage 3

For the 'Final Performance' dialogue is needed so I'll be using a clip from Ella Enchanted. (Link to the clip below!)

                                                                          Sound Clip!

For this I had a few things in mind, mostly a damsel in distress sort of situation, but that seemed to similar to the film, so now the scenario will be two characters eyeing up the last cake in a bakery sorta situation!  
As the making stage isn't exactly one of my strengths my character designs stay quite simple. Below are some doodles I've done, but for the final character design I used Alexa Chungs face as reference. Best face. 
I like the coloured nose and rosy cheeks style. ^_^


All of my male character designs looked wayyy to similar to the one I made last year! So I'll probably add a beard or something just to make it look a bit different. And a bigger nose. Noses are fun to make. ^_^


I can't get this cake out of my head since watching The Grand Budapest Hotel. It's so pretty!


Cazy basic thumbnails.


(I suck at drawing action sheets, but I like the bike. I can draw bikes.)


Tuesday, 16 December 2014

After Effects Project

So below is the unedited and the final edited version of my animation for the After Effects project. :} Involved rig removal, green-screen, changing the brightness on every other frame, a few meltdowns, and the sparkles!


Oh, and since I seem to be dreadful at keeping my blog up to date, here's a link to my instagram below. Full of doodles, animation, gigs and my cat. :}
A photo posted by Laura Jones (@fantanazz) on
Instagram

A broom, hat and wands!

My new armature looking all fancy. Extra joint in the spine. oooo 


During this part of the project I was crazy ill, so taking photos of the making process wasn't really a priority at the time. Here's a little doodle of how I made the broom. :}

1. Twisted wire to the size I wanted the broom.
2. Glued a bit of K&S to the side to create a rigging point.
3. Sewed brown felt around the wire. The K&S gave the broom a cool ridged look. :)
4. Sewed copper wire to the end of the broom to make it animate-able. (Is that a word?) 
5. Then stitched the wool over the top! 


Broom & rig. aw


 Spot the rigging point.


First test of animating the broom on my bedroom floor. ^_^ 


Now onto the hat! 
1. Measured the size of the armature head and then cut the bottom part of the hat out of black felt.
2. Ugh Maths. Literally the first time I've needed to know about circumference and all that nonsense since GCSEs. But yeah, Maths happened to find out the cone measurements.
3. Stitched the cone up. 
4. Sewed the cone and the bottom together. TaDa!


I made four different kinds of wands, it's nice to have a choice. ^_^ Glued teeny magnets onto the bottom so it would be easier for the armature to keep hold. 


Wooah last post was in July? Oops. 

Ooookay, so I'm currently in the middle of pre-production on my final project in uni, scary stuff! But I'll save all that for another post, which will probably be posted a trillion years after the deadline.

The latest project was to animate and then use After Effects to make it all snazzy/get our heads around using the programme. I wanted to use an effect that you'd also have to use in live action so magic was the first thing to come to my mind. Magic = Fun. If there's a TV Show with a witch, there's no doubt that, that character will be my favourite, so it was decided! My armature was going to be a witch!


I already had the idea to animate the character casting a spell, I just needed to decided what kind of spell. My alternative option was to animate a witch on a broom, so I combined both ideas and came up with a sort of Fantasia themed animation, where a broom comes to life. 

Below are some quick thumbnails of ideas and key poses. ^_^


(Thumbnails/plan)


Keeping in mind I hadn't the foggiest idea how to use After Effects, I had to decide what effects I was going to use. Which was kinda stressful considering I unsuccessfully tried to create fire while listening to a tutorial by what sounded like a 8 year old boy.

But I got there in the end! Take that 8 year old boy! I can also make fire! IT'S CUBES! It's just blurred cubes! 


I wanted some sort of effect to come out of the wand to show the direction of the spell. In the end my aim was for that 90s sparkle effect, like in Sabrina the Teenage Witch/Buffy.


Below is my first test of the sparkles. Colour change and everything!